#Farm Machinery & Equipment
How to maintain a quality silage store
With losses from silage clamps predicted to be as high as 40%1, it’s crucial they’re prepared and filled correctly to preserve silage quality and reduce wastage during storage.
Read our best practice top tips to help maintain a quality silage store this year.
Preparing the clamp
Ahead of filling the clamp, make sure all old silage is removed, the floor and walls are washed down and any drainage channels are free-flowing.
If necessary, make repairs to walls to make sure they’re airtight and add plastic sheets. This will prevent the silage from directly touching the clamp, reducing wastage at the sides.
Clamp filling – compaction and gradient
Depending on the crop to be ensiled, the clamp will need to be filled using one of two techniques as this will ensure the best quality silage is created and maintained.
A grass silage clamp should be filled horizontally using a length before height method. Layers that fill the clamp from back to front are added on top of each other. As layers are added the silage height within the clamp increases.
Maize or whole crop clamps should be filled in using the progressive wedge technique. The back of the clamp is filled first with a layer angled at no more than 20 degrees2 before another layer is added on top. As the following layers are added at the same angle, the height of the clamp gradually builds up against the back wall and the whole clamp fills.
The layers of any crop should never be more than 20cm thick.
Compaction is key when ensiling crops as this creates the anaerobic conditions that are essential for good fermentation and preventing dry matter (DM) losses. As a rule of thumb, the drier the crop, the more it will need to be compacted. Remember that effluent seeping from a grass clamp while it is being constructed is a sign of over compaction.
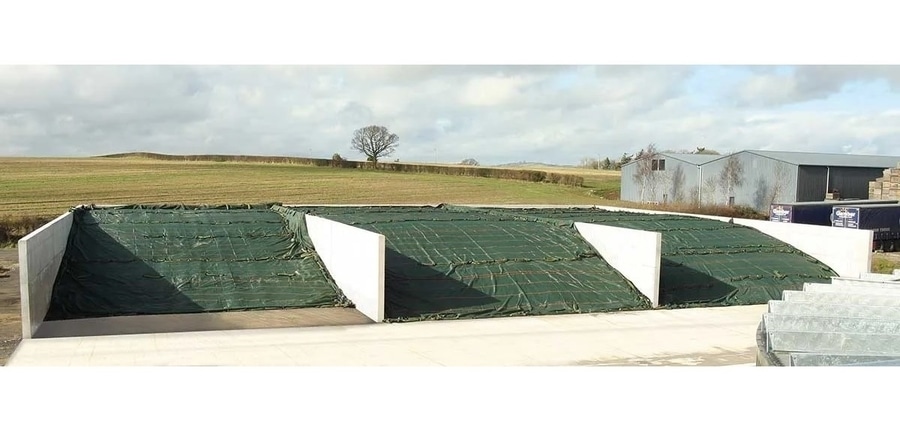
Sheeting up – sealing and weight
Sheeting the clamp as it’s being filled will prevent time being spent covering the whole clamp once it’s consolidated. It will also reduce exposure to oxygen. If the clamp is being filled over a number of days, it will need to be completely covered each night.
Clamps should be sealed with a proven oxygen barrier that should overlap by at least 1m to prevent holes and be tucked in at the sides. Adding weight to the top of the clamp helps to further eliminate oxygen pockets and to reduce aerobic spoilage losses on the top of the clamp. The weight should be added evenly across the clamp and close attention paid to the corners and areas where the sheets overlap. This will prevent it from being lifted by wind and stop water and oxygen ingress.
Tyres are traditionally used to weigh down silage clamps but they can take time and effort to apply. They also need to be stored when not in use. Tyres don’t offer protection from rodents or birds and the wire in them can damage the oxygen barrier sheet, leading to the top of the clamp being spoiled.
Galebreaker silage sheets are an effective labour-saving alternative to tyres for the following reasons:
They’re easily applied over the top of oxygen barrier sheets
The sheets can be simply rolled up after use for storage
They mould to the top of the clamp and are made with loops to hook Sila-bag gravel bags onto. These bags, that are supplied with the sheets, add weight and help to further seal the clamp and ensure silage quality is maintained.
The close weave and hard wearing properties of the sheet prevent birds and rodents from being able to peck or scratch through to the oxygen barrier sheet, saving the need for additional netting on top of tyres. This will also mean time won’t need to be spent patching up holes.
Read our handy guide on how to apply a Galebreaker silage sheet here and click here to contact our team to find out more.


